
I want to say right from the get that I did not come up with this way of doing things. I learned most of it from someone else's blog back when I first started digiscrapping (I was not yet good at keeping track of things) but I have searched and searched for it again and cannot find it! So if it is you, or if you know the person who did this originally, please let me know so I can credit the right person!
In the meantime, I’m going to write it up and re-post in my own words here because this technique has helped me invaluably!
This is for all you scrappers who scrap out of order and whatever you feel like and then never turn anything into an actual album because nothing is completed! Lol I know you are out there! I was one of them!
~~~~~~~~~~~~~~~
First thing you need to do is decide how many pages you’re looking for in an album. You can always revise this number but its good to have a reference point so you don’t go overboard. I chose to have 50 pages with the first and last left blank (for the inside front and back covers), therefore I will only make 48 layouts.
Then, I went to the folder that holds all my sons first year photos. It was easiest for me to make a new folder named “to scrap”. Then I went through all the pictures I had of him from his first year. All the ones I wanted to scrap I copied into the “to scrap” folder. (Do not move these photos because you don’t want to accidentally lose or misplace them.)
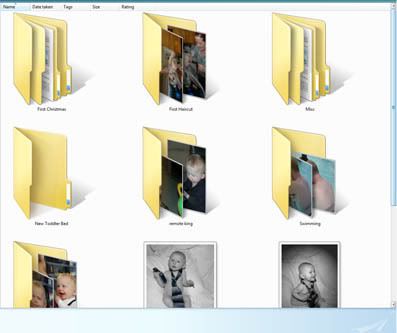
After you have chosen a slew of photos and copied them into the “to scrap” folder, the next step is to sort the pictures to scrap. As you go through the pictures to scrap, separate them into groups which you might include on the same layout. Put them in a new folder labeled with the preliminary layout name you may chose. Here’s a screen shot of a bunch of my folders I have organized (note: at this time the majority of my layouts are completed and I have removed the folders containing pictures of completed layouts):
Then, I went to the folder that holds all my sons first year photos. It was easiest for me to make a new folder named “to scrap”. Then I went through all the pictures I had of him from his first year. All the ones I wanted to scrap I copied into the “to scrap” folder. (Do not move these photos because you don’t want to accidentally lose or misplace them.)
After you have chosen a slew of photos and copied them into the “to scrap” folder, the next step is to sort the pictures to scrap. As you go through the pictures to scrap, separate them into groups which you might include on the same layout. Put them in a new folder labeled with the preliminary layout name you may chose. Here’s a screen shot of a bunch of my folders I have organized (note: at this time the majority of my layouts are completed and I have removed the folders containing pictures of completed layouts):
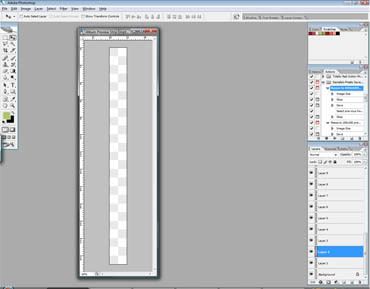
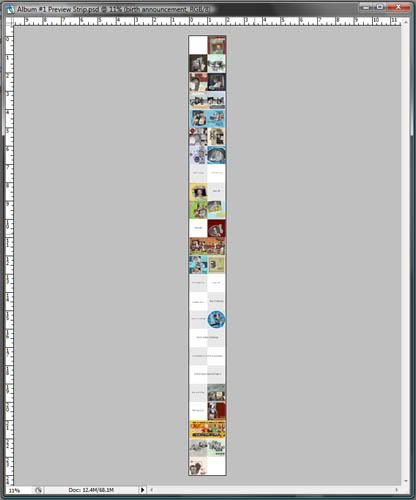
Now open Photoshop. Create a new document. The length of the document should be half of the number of pages you want in your album. For instance, my new document is 25 inches tall and 2 inches wide at 300 dpi. There will be 2 pages side by side just as in an album. This makes it easy to see what your album will look like in the end. Here’s my strip:
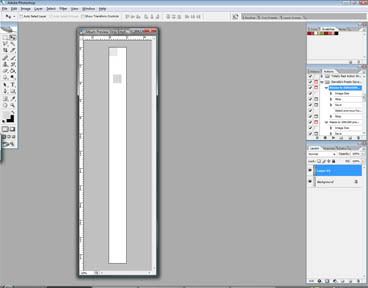
In order to make it easier to place your layouts in the correct positions, I am going to make checkered gray squares where my pages will be. Choose your square marquis tool by pressing M. At the top of the screen, change the style to fixed size and set it to 300 px x 300 px. Click anywhere on the strip and a little marching ants box should show up. Go to Layer > New… > Layer (or press shift+ctrl+N). Then select your paint bucket tool and choose a very light shade of grey. Click inside your marching ants to make a small gray square. Here’s mine:
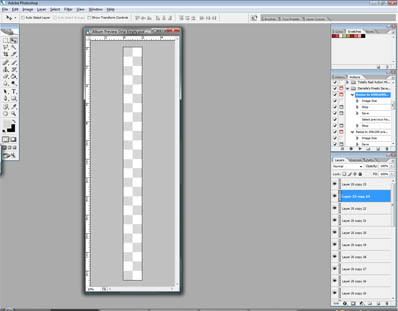
Move that box into the top left corner (it should snap into place perfectly, if not, the 2 edges should exactly be touching the side of the document). Duplicate that layer and move the duplicate down and to the right so that just the corners are touching. Keep doing this until you have checkered your whole strip. Here’s what mine looks like now:
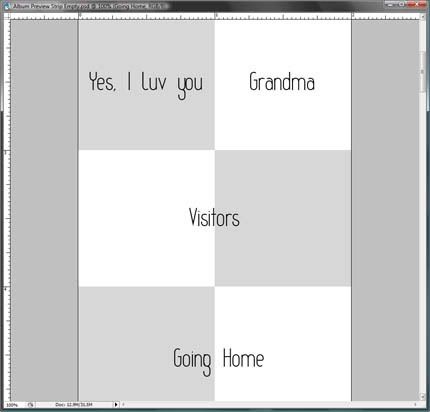
Now, zoom in to 75-100% and start naming the pages and putting them in the order you want. Make sure these correspond with the layout folders you created earlier. Here’s a little bit of my preview strip with layout labels. The top row are single page layouts and the second 2 rows are double page layouts.
After you’ve labeled every page you can start making your layouts in any order you feel inspired for but at least you’ll be working toward a goal. When you’re done creating a layout and after you’ve saved your .psd file, 3600x3600 .jpg file, and a 600x600 web .jpg file, resize your image to 300 by 300 pixels. Then drag it onto your preview strip in the square it belongs to covering up your label. Here’s what mine looks like at this moment:
So I hope this has helped you as much as it has helped me! Happy Scrappin!


2 comments:
This is a great tutorial. TYVM for sharing!
That is very clever. Thanks! I have a lot of layouts, but no completed albums. I may try this.
Post a Comment