Alright, This is done using PSCS2 but the concepts are there so you should be able to do this no matter what program you are using.
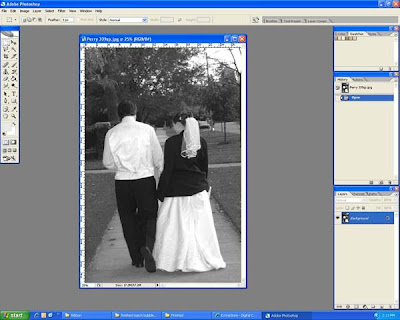 First, Open your image. I'm using this one of a bride and groom walking down the street.
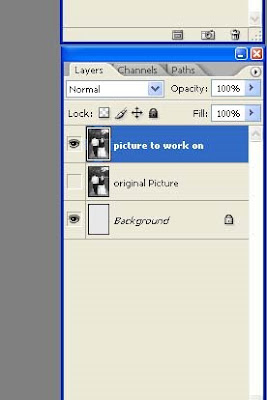 Next, make 2 duplicate copies and name them "original" and "working". Make the original layer invisible. This is just an insurance layer in case something goes wrong. on the bottom layer, fill it with one whole solid color. If you know what color you will be placing the extracted photo on, use a color that matches that the best. Your setup should look like this.
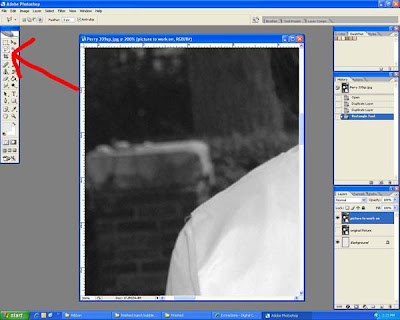
Zoom your picture WAY in. mine here is at 200% but it depends on your picture. Next, choose the Polygonal Lasso Tool. I have found that I have the most control with this tool rather than the regular lasso or the magic wand. If you find another tool easier to use, then use that one. You will want to choose a feather amount. This number willchange from picture to picture. I used 1px feather for this one. To choose the best size feather, just follow the next couple of steps and undo it if it doesn't look right. you will probably not get the best results when the feather is set to zero.
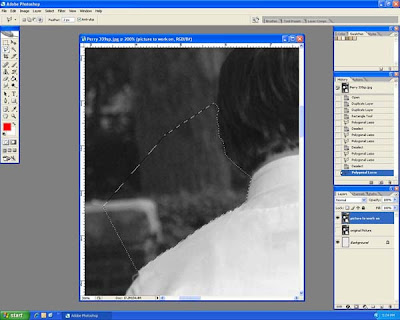 Now, little by little, start making small selections. start someplace that is easy to discern and follow the path along the object. (with the polyganal lasso, you will have to make numerous clicks along the way) after you've followed the object for a little ways, close off the selection. Here's what mine looked like at this point.
Delete the area and you should come up with something like this:
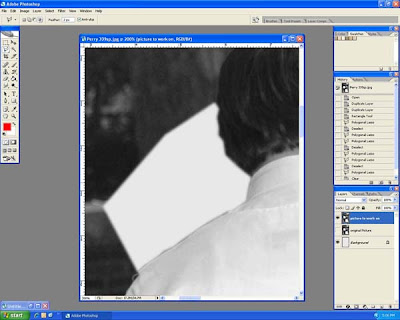
Notice that there is a little bit of darkness between the man's shirt and the white background. here I just need to go back and make my selection a little closer to the shirt and delete it again. It's always best to err on the side of not being close enough than to have cut off too much in the first place.
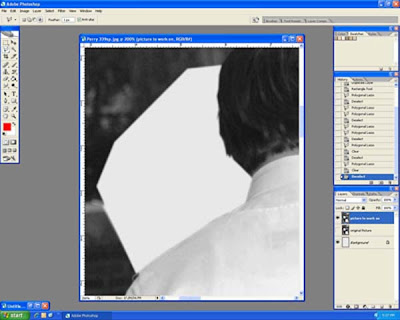 Here is my pic after this fine-tuning. Continue around the rest of the picture just deleting bits and pieces and fine-tuning either as you go and/or when you're finished.
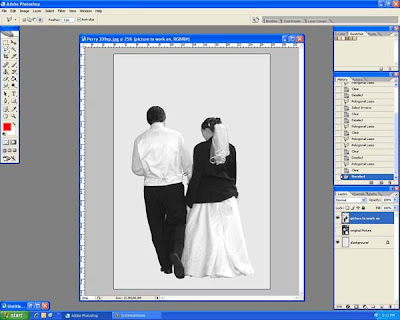 Here is my extraction after the rest of the pic has been deleted.
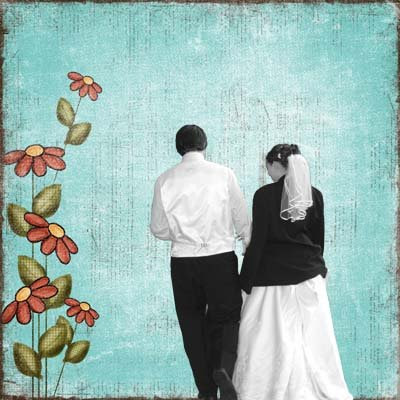 Now Add your extraction to your page. I put this pic out of the paper a little so it doesn't look like they are walking on thin air (as much anyway).Remember, this may take lots of practice before it looks really realistic but keep playing around with the different settings and zoom levels and you will get it!





1 comments:
This was very helpful to me and appreciate this very much. Thanks!
Post a Comment