
So I'll get right into it:
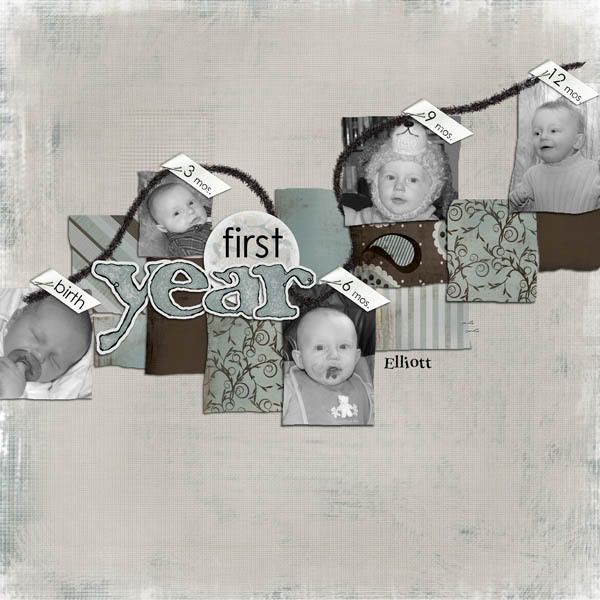
When you are done making a layout (and after you’ve saved it), make sure all the pieces are still in their own layers. This is a layout I made based on a layout or sketch in a print magazine. I never made a template from it before, but I know there is one out there that it similar to it. At the end of this tutorial, I’ll package up the template I made and give it to you all for free!
So, the first thing I do is get rid of all my shadows and layers I am not going to need. In this case, I realized I saved this file originally with a lot of hidden layers and copied layers. Plus I don’t need the layers that say the ages since I know that words are going to go there.
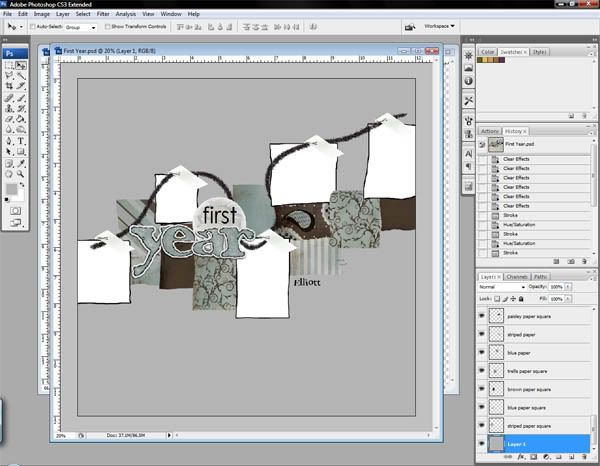
Next you need to make the spaces for photos. Click on one of your photos in the layers pallette. Go to image > Adjustments > Hue/Saturation. Move the lightness slider all the way to the right to make the “photo” completely white. I also usually stroke the photo with black so it’s easier to see where the photo goes. This will be important in some cases, and not as important in other cases. Do these steps for all of the photos on your layout. This is where we are now:

Next, let’s work on the papers. First, let’s make the background. For this layout, I’m going to make the background paper be solid. You can decide to make all your papers solid (which is easier) or you can decide which papers should be patterned if it matters to you. I’ll make some of my papers patterned later.
First, choose your background layer, then make it a selection by pressing ctrl+a or ctrl while clicking the thumbnail of the layer. Then, make a new layer. Choose a solid color. I always use a grey-toned color, but that is up to you. Fill your selection in the new layer with the color you chose. Deselect and remember to delete your original background layer. Here’s what mine looks like now:
Now, I’m going to do make all my other solid papers into solid colors. Again, I will choose the layer, then ctrl+click on the thumbnail of the layer, make a new layer, and fill the selection with a grey-toned color, then deselect and delete the original layer. Remember that this color should be different from your background so it doesn’t blend together. Don’t forget to take some time out to label your layers. I’m naming them according to what I am supposed to put there, ie. Dark solid paper, striped paper, etc.
Now, we’re going to do some patterned papers. The first one we’ll do is striped. Find a patterned paper in your layout and choose it in the palette. Now you are going to have to make a new document. It only has to be about an inch square. Choose your rectangle marquis tool and choose the left half of the document. Fill with a solid color. Then hit ctrl+shift+i to get the other side of the document. Fill that side with a different solid color. This is what it should look like:

Now go to edit > define pattern and click okay when the dialogue box comes up. Now, close that document without saving. Now that you’re back at your layout/template file, go to layer > new fill layer > pattern and again choose okay and then another dialogue box will show up. I usually only need to adjust the scale at this point. When it looks the way you like it, click okay. Right-click on the pattern fill layer in the layers palette and choose rasterize. Then, (making sure this layer is directly above the one you want to replace) hit ctrl+shift+g to create a clipping mask. Then hit ctrl+e to merge the pattern down. Rename the layer if you need to.
My screenshots decided to quit working so I will upload screenshots another time.
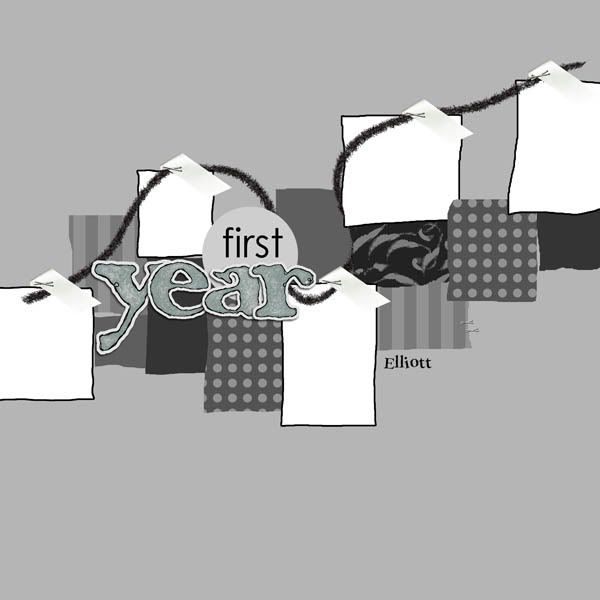
You can also make other kinds of patterns in the same way we made the stripes. Try placing a circle in the middle of the document next time, or play around in other ways! Here’s my page now that all my patterned papers are replaced:
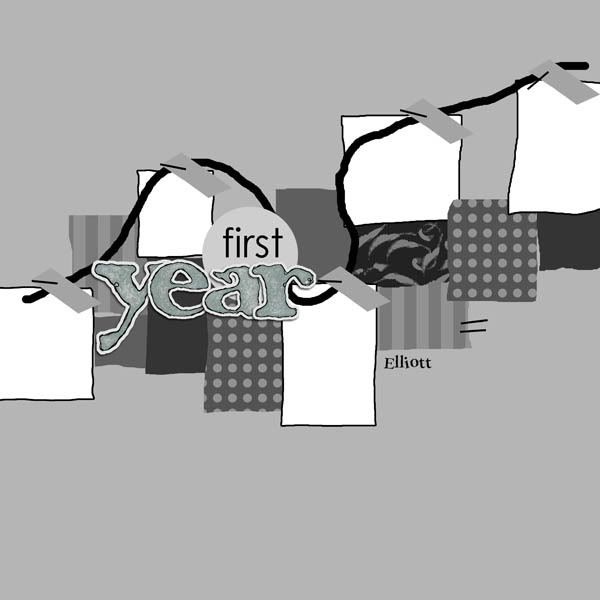
Now I’m going to replace some of the elements. These are usually pretty easy. If there are embellishments, one thing you can do that is easy is delete the embellishment and put an X in its place. Ribbons can be solid colors just like papers. Staples can simply be drawn-in straight lines. Stitching can just be x’s or lines or doodling where the stitching should be, etc. On this layout, I have a curved fiber that I will simply draw over on another layer to replace it. I will also make lines with the line tool for stitching, and I will also simply fill the ribbons with a solid color. (I’ll also take the time to remind you again to label your layers every time.) Here’s what it looks like now:
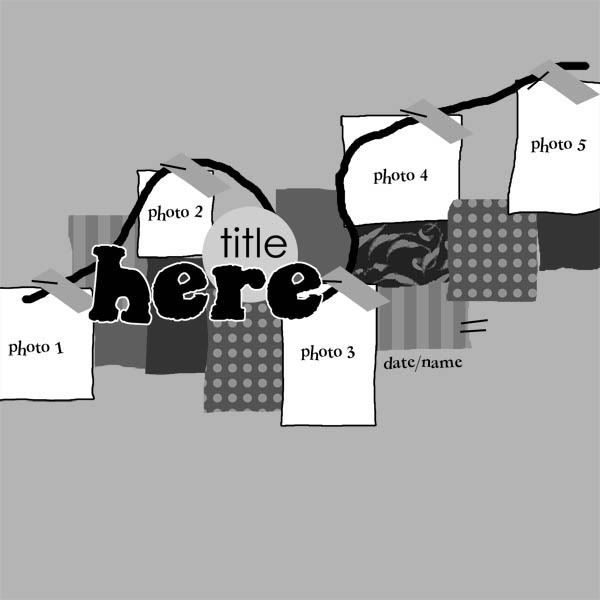
Lastly we’re going to change the title and journaling, and also label the photos. So make a text Layer over top of your title. Put “your Title” or “Title goes here” or whatever fits on your layer. I’m going to put “title Here” and “title” will go where “first” is and “Here” will go where it says “Year” right now. Generally you can do this in black. I also have a little journaling place that says Elliott right now, but I will change that to “date/name”. Also make your photo labels. When you’re done with all this, remember to rasterize the text layers. I usually merge the text layers all into one layer so it saves on files space, then rename it “delete me” or something of the like.
Now, we’re going to do some patterned papers. The first one we’ll do is striped. Find a patterned paper in your layout and choose it in the palette. Now you are going to have to make a new document. It only has to be about an inch square. Choose your rectangle marquis tool and choose the left half of the document. Fill with a solid color. Then hit ctrl+shift+i to get the other side of the document. Fill that side with a different solid color. This is what it should look like:
Now go to edit > define pattern and click okay when the dialogue box comes up. Now, close that document without saving. Now that you’re back at your layout/template file, go to layer > new fill layer > pattern and again choose okay and then another dialogue box will show up. I usually only need to adjust the scale at this point. When it looks the way you like it, click okay. Right-click on the pattern fill layer in the layers palette and choose rasterize. Then, (making sure this layer is directly above the one you want to replace) hit ctrl+shift+g to create a clipping mask. Then hit ctrl+e to merge the pattern down. Rename the layer if you need to.
My screenshots decided to quit working so I will upload screenshots another time.
You can also make other kinds of patterns in the same way we made the stripes. Try placing a circle in the middle of the document next time, or play around in other ways! Here’s my page now that all my patterned papers are replaced:
Now I’m going to replace some of the elements. These are usually pretty easy. If there are embellishments, one thing you can do that is easy is delete the embellishment and put an X in its place. Ribbons can be solid colors just like papers. Staples can simply be drawn-in straight lines. Stitching can just be x’s or lines or doodling where the stitching should be, etc. On this layout, I have a curved fiber that I will simply draw over on another layer to replace it. I will also make lines with the line tool for stitching, and I will also simply fill the ribbons with a solid color. (I’ll also take the time to remind you again to label your layers every time.) Here’s what it looks like now:
Lastly we’re going to change the title and journaling, and also label the photos. So make a text Layer over top of your title. Put “your Title” or “Title goes here” or whatever fits on your layer. I’m going to put “title Here” and “title” will go where “first” is and “Here” will go where it says “Year” right now. Generally you can do this in black. I also have a little journaling place that says Elliott right now, but I will change that to “date/name”. Also make your photo labels. When you’re done with all this, remember to rasterize the text layers. I usually merge the text layers all into one layer so it saves on files space, then rename it “delete me” or something of the like.
And Voila! Here's your new template! click on the image to get this one I made special for you guys!
Have fun now making your own templates!


5 comments:
Maria! That is totally awesome! I'm bookmarking this post, so I can do this sometime! Thanks for sharing!
Great tutorial!! I made a template after flattening the image and it was a PAIN! This is so much easier! Thanks for the tips!!
Thank you! Your blog post will be advertised on the DigiFree Digital Scrapbooking Freebie search engine today (look for timestamp: 08 Aug [LA 12:00am, NY 02:00am, UK 07:00am, OZ 05:00pm] ).
Thank you so much Maria I've been wondering about this :0) I love the template you created - I just hope I can create on e just as good!
Thank you so much Maria! This is the most indepth tut on templates I have been able to find! It's bookmarked now!
Post a Comment